
Each person who works in SmartOLT needs their own user. The group of a user decides what the user can do, and a restriction group decides which part of the network the user can see.
1Open the Users page
Open Settings → General in the top menu, then open the Users tab.
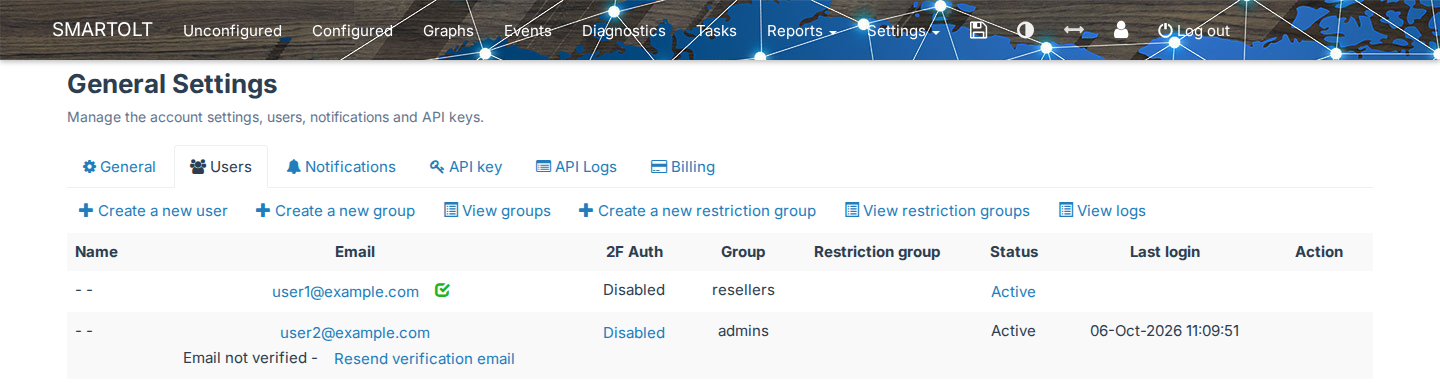
The table shows each user with these columns:
| Column | What it shows |
|---|---|
| Name | The first and last name of the user. |
| The login of the user. Click it to edit the user. | |
| 2F Auth | Enabled or Disabled. When two-factor authentication is required, Mandatory appears under it. |
| Group | The group of the user. See Groups. |
| Restriction group | The restriction group of the user. |
| Status | Active or Inactive. |
| Last login | When the user last logged in. |
Above the table, administrators see these links:
- Create a new user
- Create a new group and View groups
- Create a new restriction group and View restriction groups
- View logs, the history of changes to users, groups and restriction groups
Only users in the admins group can create, edit, deactivate and delete other users. Other users see only their own row.
2Add a user
Click Create a new user.
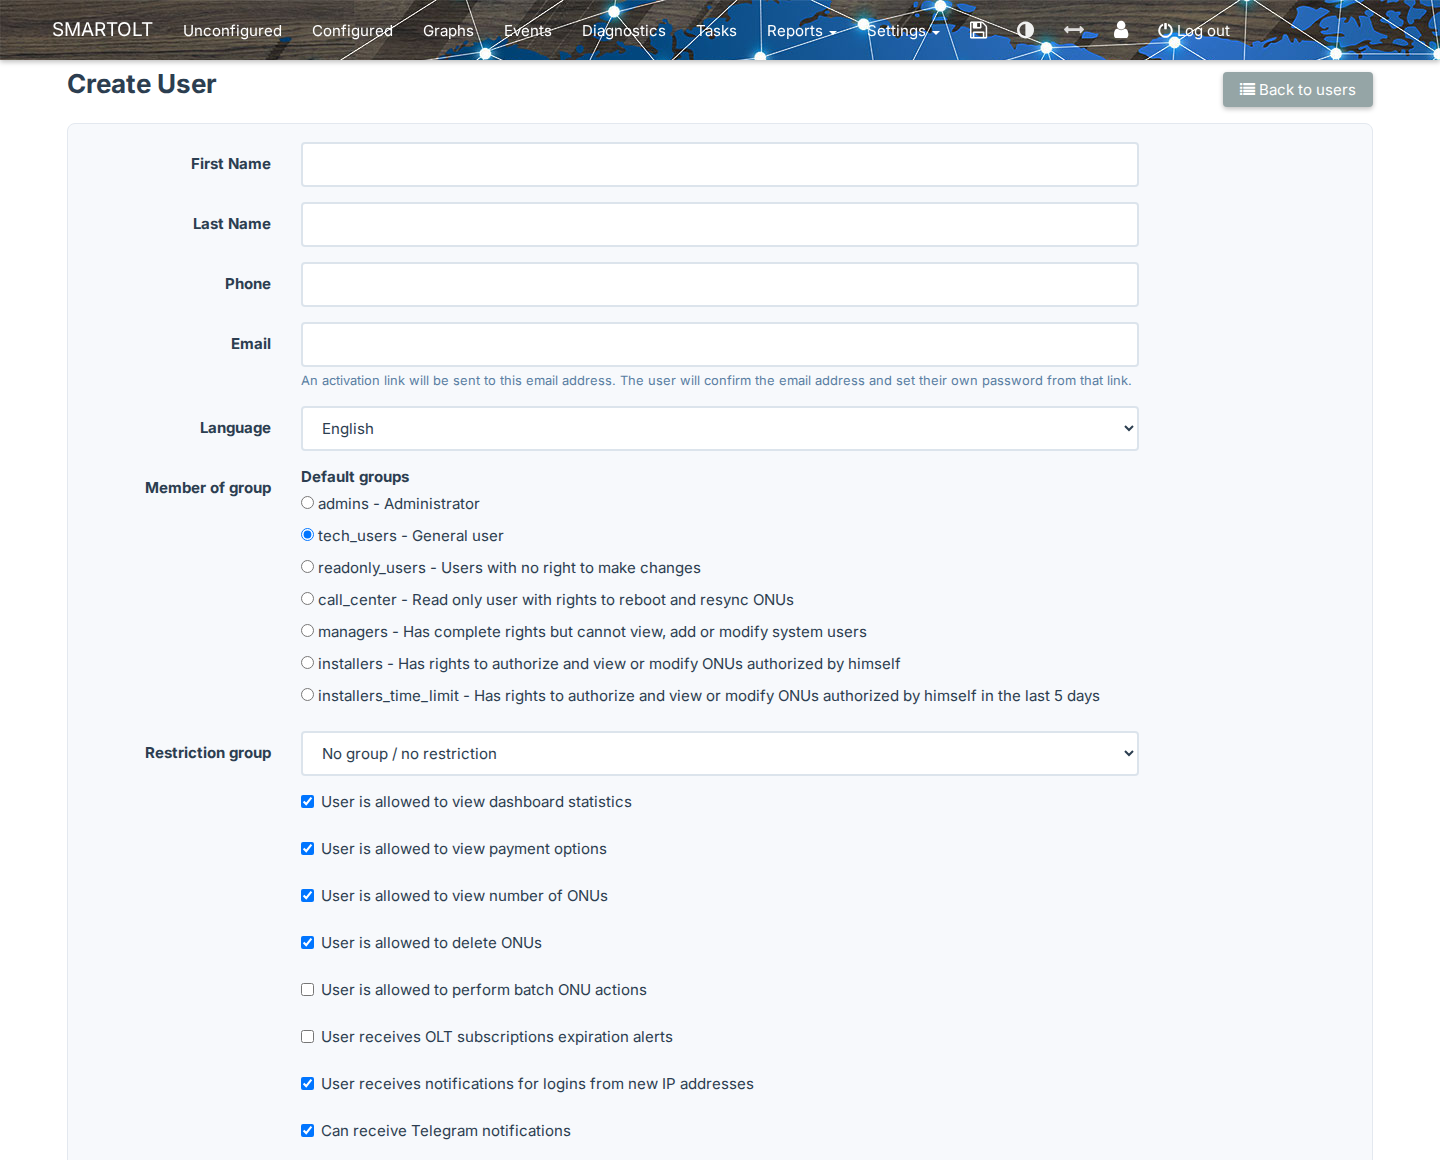
| Field | What to set |
|---|---|
| First Name, Last Name | Required. |
| Phone | Required. |
| Required. The user logs in with this address. | |
| Language | The language of the interface for this user. |
| Member of group | The group of the user. A user belongs to only one group. By default, tech_users is selected. |
| Restriction group | Optional. No group / no restriction gives the user access to all OLTs. |
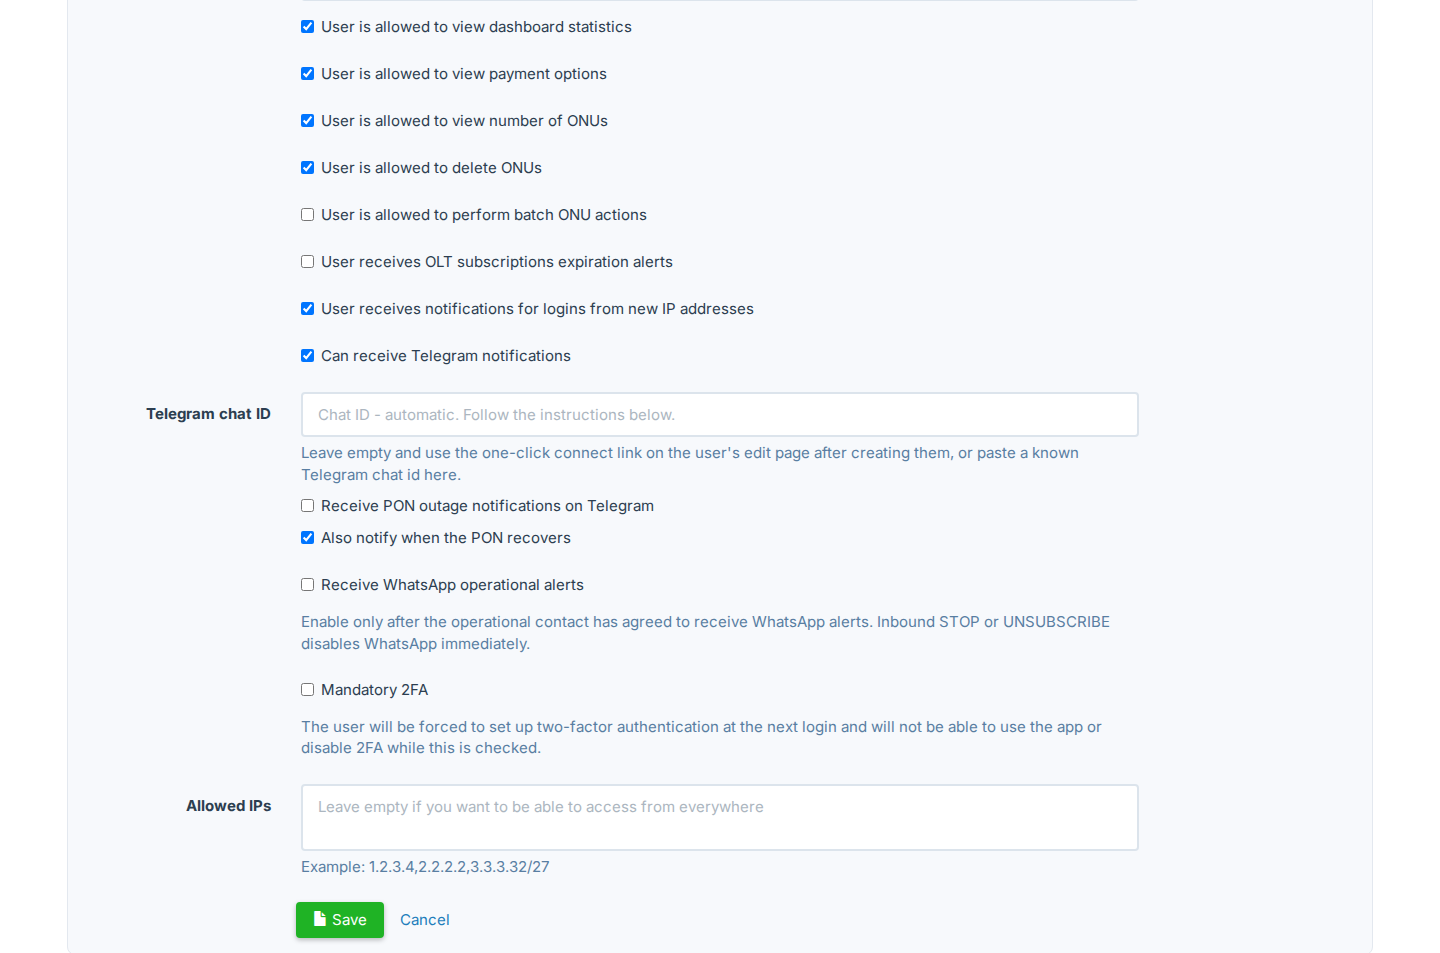
The check boxes in the lower part of the form add or remove single rights:
| Check box | Effect |
|---|---|
| User is allowed to view dashboard statistics | Shows the statistics on the dashboard. |
| User is allowed to view payment options | Shows the billing and payment pages. |
| User is allowed to view invoices | Appears only for the managers group. |
| User is allowed to view number of ONUs | Shows the ONU counts. |
| User is allowed to delete ONUs | Allows the user to delete ONUs. |
| User is allowed to perform batch ONU actions | Allows actions on many ONUs at the same time. |
| User receives OLT subscriptions expiration alerts | Sends the user an email before an OLT subscription expires. |
| User receives notifications for logins from new IP addresses | Sends the user an email when someone logs in to the account from a new IP address. |
| Mandatory 2FA | Forces the user to set up two-factor authentication. See Two-factor authentication. |
| Allowed IPs | The IP addresses that the user can log in from, separated by commas, for example 203.0.113.10,198.51.100.0/24. Leave it empty to allow every address. |
Click Save.
SmartOLT does not ask you for a password. Instead, it sends an activation link to the email address, and the user opens the link, confirms the address and sets their own password.
Until the user finishes the activation, the Status column shows Inactive. If the user did not receive the email, click Resend activation email in the Status column. You can resend the email once every 5 minutes, and the activation link expires after 7 days.
To change a user later, click the email address in the Email column. To block a user without deleting the account, click Active in the Status column and confirm.
3Groups
The group of a user decides which actions the user can do. SmartOLT has default groups, and you can also create custom groups.
Default groups
| Group | What the user can do |
|---|---|
| admins | Everything, including users, groups, restriction groups and API keys. |
| managers | Everything, except view, add or change other users. Managers can manage API keys. |
| tech_users | Everything, except user management, API key management and SNMP trap settings. |
| readonly_users | View only. The user cannot change anything. |
| call_center | View only, plus Reboot ONU, Resync ONU config and Configure ONU WiFi ports. |
| installers | Authorize ONUs, and view and change only the ONUs that the user authorized. |
| installers_time_limit | The same as installers, but only for the ONUs that the user authorized in the last N days. You set N in Time limit for installers to see ONUs (days) in the general settings, and the default is 5. |
| resellers | Everything, unless Limit reseller access is Yes in the general settings. In that case, a reseller gets only the basic rights, plus the rights that you give. Users in the admins group cannot select this group in the user form. Only a superadmin or a reseller can assign it. |
Users in installers and installers_time_limit do not see the dashboard statistics. Users in installers_time_limit also do not see the number of ONUs.
Custom groups
If no default group fits, create a custom group.
- Click Create a new group.
- Enter the Group Name. You can use only letters, digits, dashes and underscores.
- Enter a Description. The description appears next to the group name in the user form.
- Under Rights, keep or clear each right. The rights are sorted in sections: Main menu, ONUs, Map, OLTs, Settings and Tasks. At the start, all rights are selected.
- Click Save.
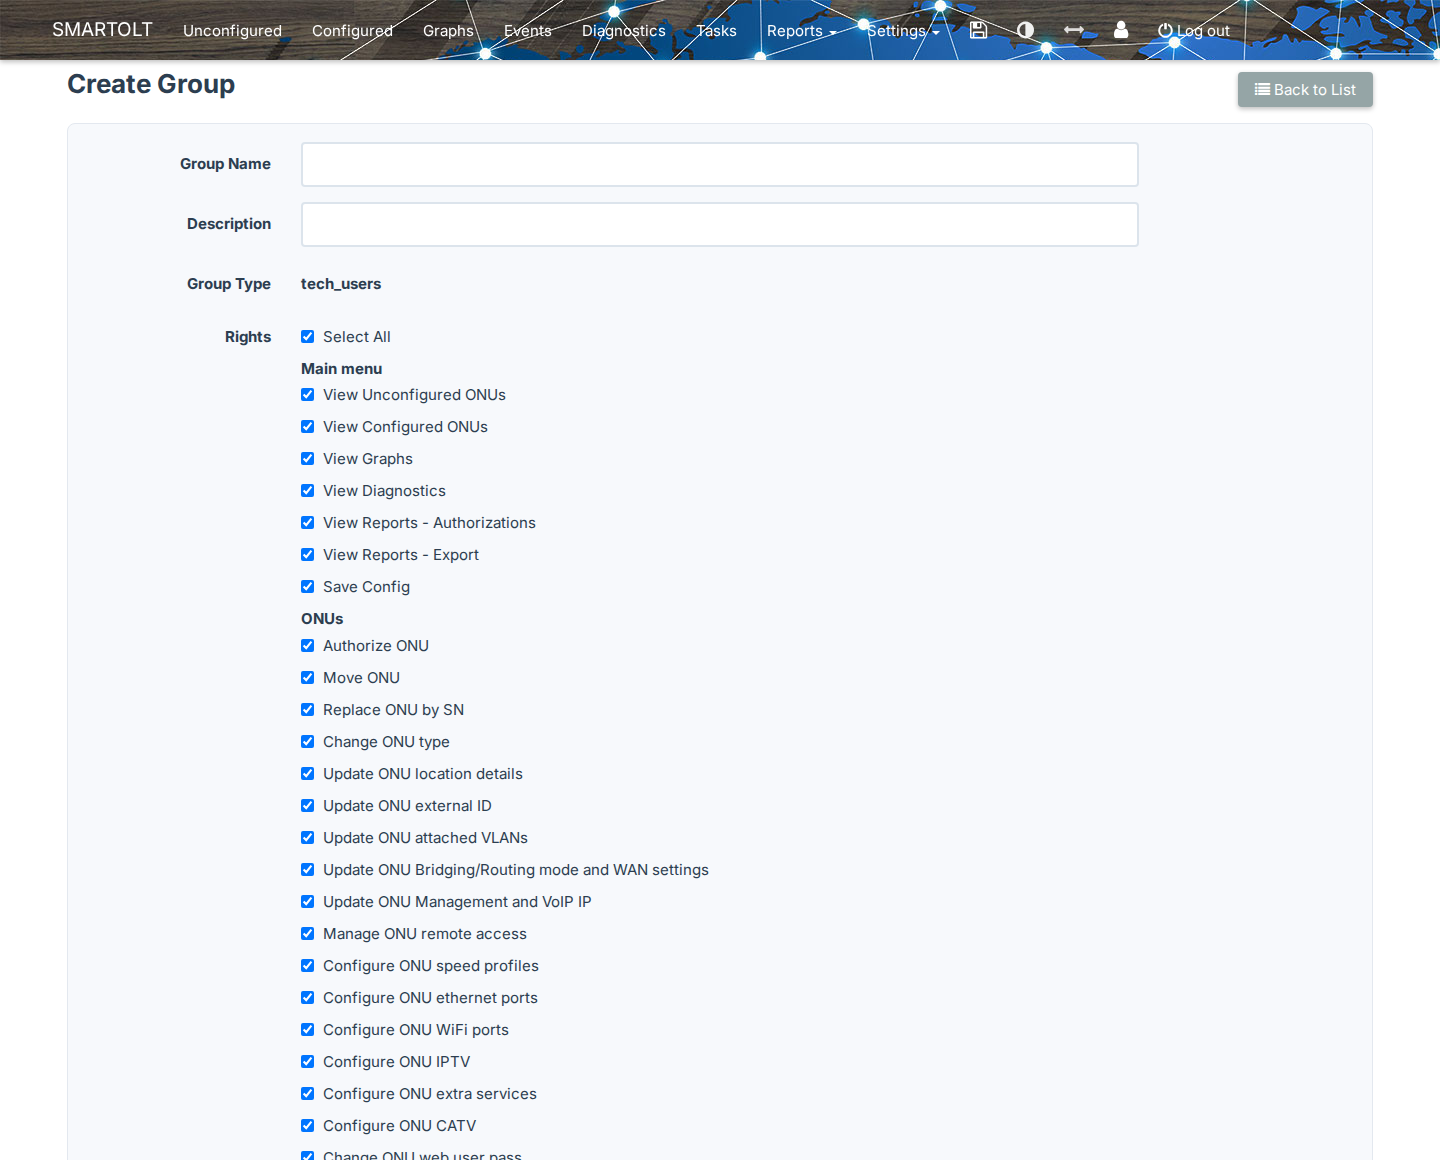
The new group appears under Custom groups in the user form. To see all groups and the users in each group, click View groups.
4Restriction groups
A restriction group limits a user to part of your network, so the user sees only the OLTs, PON ports, zones, VLANs and sectors that the group allows.
Create a restriction group
Click Create a new restriction group.
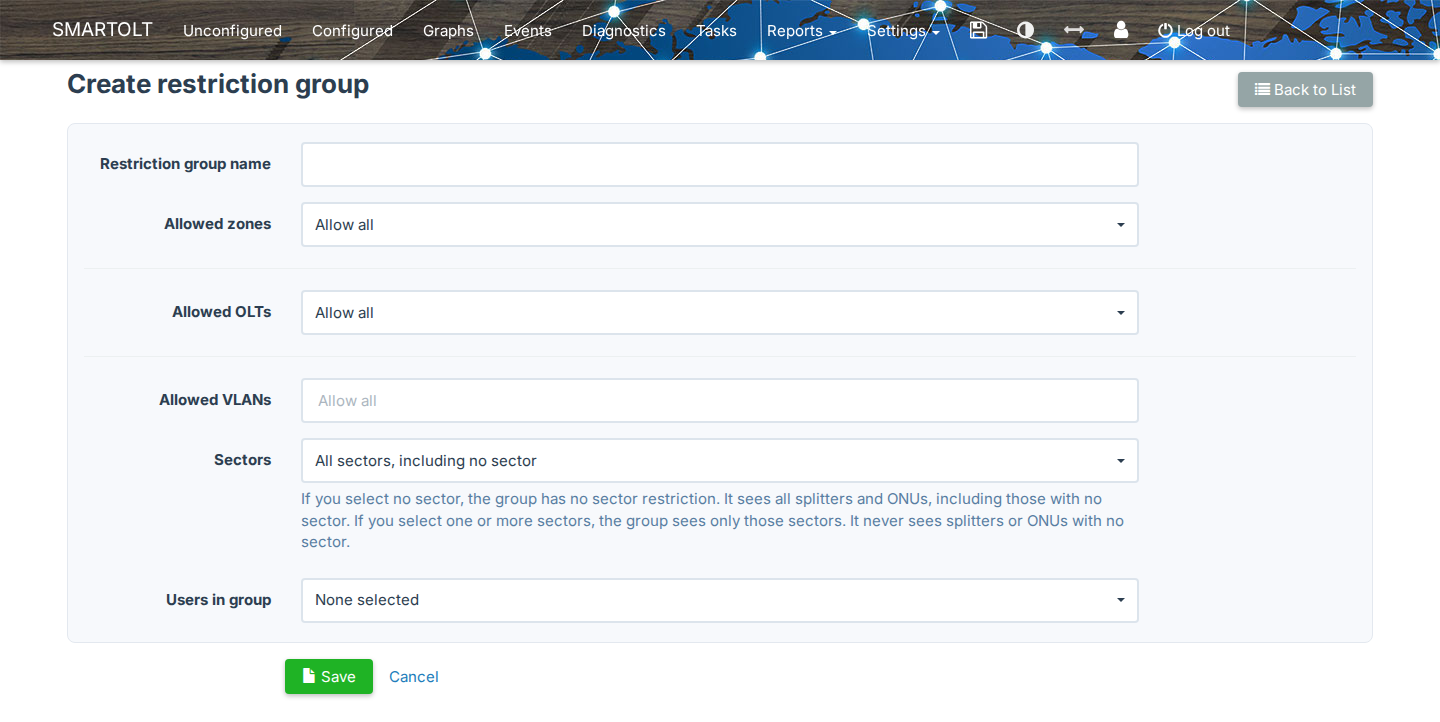
| Field | What to set |
|---|---|
| Restriction group name | Required. Each name must be unique. |
| Allowed zones | The zones that the users can see. |
| Allowed OLTs | The OLTs that the users can see. |
| PON ports | Appears for each OLT that you select. Select PON ports if you want to limit the users to those ports. |
| Allowed VLANs | The users see only the ONUs that use at least one of these VLANs. Enter VLAN IDs and ranges separated by commas, for example 100,200-210. Valid values are 1 to 4094, and untagged. |
| Sectors | The sectors that the users can see. |
| Users in group | The users who get this restriction. |
An empty field means that there is no limit on that item. An empty list shows Allow all, and an empty Sectors list shows All sectors, including no sector.
Some fields depend on the settings of your account. For example, Allowed zones, Allowed OLTs and Sectors appear only when that type of restriction is enabled.
If you select one or more sectors, the users never see the splitters or ONUs that have no sector. So assign sectors to your splitters and ONUs before you restrict users by sector. The form shows how many ONUs and splitters have no sector yet.
Click Save.
Assign a restriction group to a user
You can assign the restriction group in two places:
- In the restriction group form, in Users in group.
- In the user form, in Restriction group.
A user has only one restriction group. View restriction groups lists each group with its zones, OLTs, sectors, VLANs and users.
When you delete a restriction group, SmartOLT also deletes the API keys that use it. The users of the group lose the restriction, so they can see all OLTs again.
5Two-factor authentication
Two-factor authentication (2FA) asks for a 6-digit code from an app at each login. Each user enables 2FA for their own account.
Enable 2FA for your account
- Open Settings → General → Users.
- On your own row, click Disabled in the 2F Auth column.
- Scan the QR code with Google Authenticator, Authy, Microsoft Authenticator or another 2FA app. You can also enter the key manually.
- Save the Backup codes in a safe place.
- Enter the 6-digit code from the app and click Confirm.
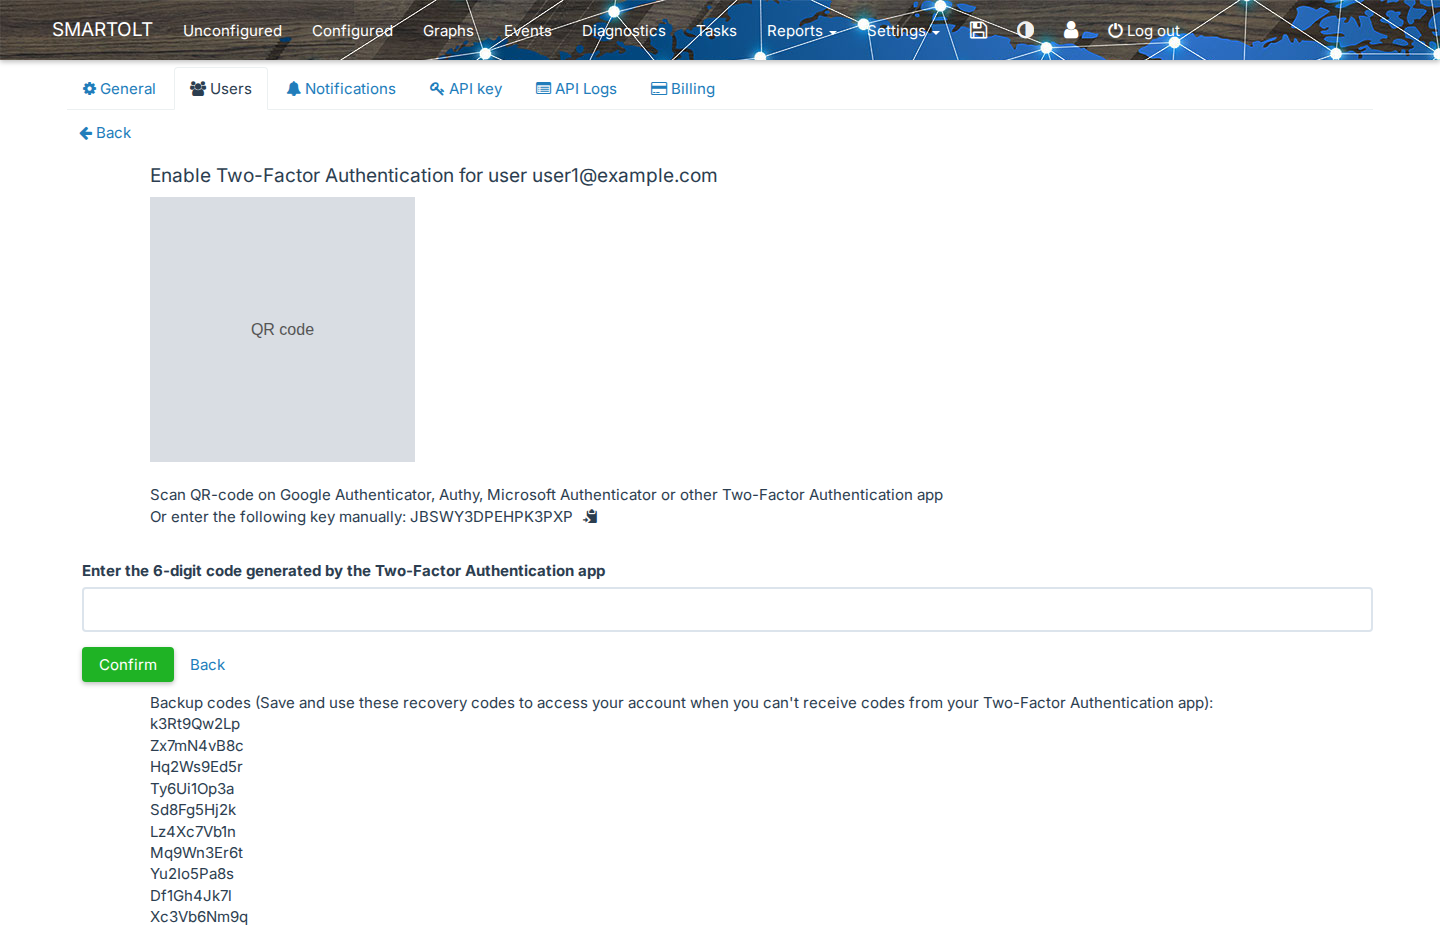
From the next login, SmartOLT asks for the Two-Factor Authentication code after the password. If you select Trust this device for 30 days, SmartOLT does not ask for the code on that device for 30 days.
If you lose your phone, log in with one of the backup codes instead of the 6-digit code.
To disable 2FA, click Enabled in the 2F Auth column of your row. Then enter the 6-digit code from the app, or a backup code, and click Confirm.
Make 2FA mandatory for a user
An administrator can force selected users to use 2FA.
- Open the user form: click the email address of the user, or create a new user.
- Select Mandatory 2FA.
- Click Save.
At the next login, SmartOLT sends the user directly to the 2FA setup page, and the user cannot use the application until the setup is complete. While Mandatory 2FA is selected, the user cannot disable 2FA.
Disable 2FA for another user
An administrator can disable 2FA for a user who lost access to the app. To do this, click Enabled in the 2F Auth column of that user and click Confirm. In this case, SmartOLT does not ask for a code.
When you disable 2FA for a user, SmartOLT also clears Mandatory 2FA for that user. If the user must set up 2FA again, select Mandatory 2FA again.
SmartOLT sends the user an email each time 2FA is enabled or disabled on their account.